
Cleaning your furry dog’s ears is an essential part of their overall grooming routine. Just like humans, dogs can develop ear infections or accumulate debris that needs to be removed. Regular grooming and proper ear cleaning can help prevent these issues and ensure that your furry friend’s ears stay healthy and clean. However, it’s crucial to approach this task with care, as improper cleaning techniques can potentially harm your dog’s ears. In this article, we will discuss how and when to carefully clean your dog’s ears.
When Should You Clean Your Dog’s Ears?
The frequency of ear cleaning for dogs depends on several factors, including their breed, lifestyle, and overall ear health. Some dogs may require regular cleaning, while others may only need it occasionally. It’s best to consult with your veterinarian to determine the appropriate schedule for your dog’s ear cleaning.
That being said, there are certain signs that indicate your dog may need their ears cleaned more frequently. These signs include:
1. Foul Odor:
If you notice a foul smell coming from your dog’s ears, it could be a sign of an infection or excessive buildup of wax and debris.
2. Excessive Ear Scratching:
Continuous scratching or rubbing of the ears can indicate discomfort, irritation, or the presence of an ear infection.
3. Ear Discharge:
Any abnormal discharge from the ears, such as pus, blood, or excessive wax, may require immediate attention and cleaning.
4. Redness and Swelling:
If your dog’s ears appear red, swollen, or inflamed, it can be a sign of an infection or allergic reaction.
5. Head Shaking:
Dogs often shake their heads to relieve discomfort in their ears. If your dog is shaking their head excessively, it may indicate a need for ear cleaning.
How to Carefully Clean Your Dog’s Ears
Proper ear cleaning involves a gentle and cautious approach to ensure your dog’s safety and comfort. Follow these steps to carefully clean your dog’s ears:
1. Gather Supplies:
Before you begin, gather all the necessary supplies. These may include a dog-specific ear cleaning solution recommended by your veterinarian, cotton balls or pads, and treats to reward your dog.
2. Choose the Right Location:
Find a quiet and calm space to clean your dog’s ears. Make sure you have good lighting, as you’ll need to observe the condition of their ears for any abnormalities.
3. Get Your Dog Comfortable:
Keep in mind that dogs may feel anxious or uncomfortable during ear cleanings. Start by gently petting and reassuring your dog to help them relax.
4. Examine the Ears:
Inspect your dog’s ears for any signs of redness, swelling, discharge, or foul odor. If you notice any concerning symptoms, consult your veterinarian before proceeding with cleaning.
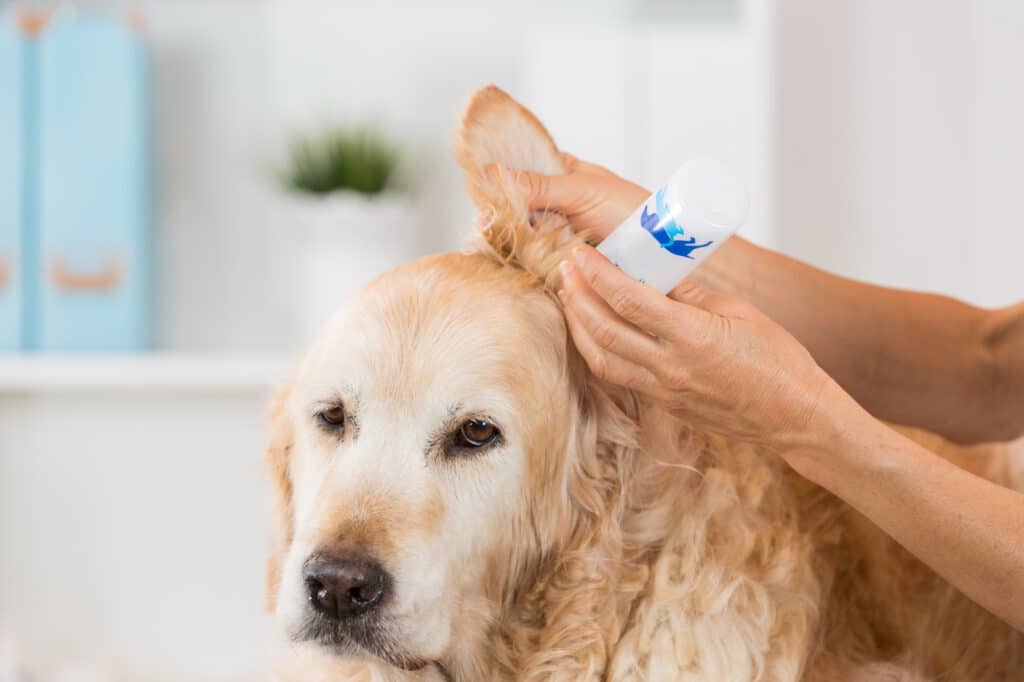
5. Apply the Ear Cleaning Solution:
Carefully follow the instructions on the ear cleaning solution bottle. Gently lift your dog’s ear flap and apply a few drops of the solution to the ear canal. Massage the base of the ear for about 20-30 seconds to allow the solution to loosen any debris or wax.
6. Wipe the Ear:
Take a cotton ball or pad and gently wipe the visible portions of your dog’s ear. Make sure to avoid inserting anything deep into the ear canal, as it can cause injury. Use a fresh cotton ball or pad for each ear to prevent the spread of bacteria.
7. Keep it Positive:
Throughout the process, offer praise and treats to keep your dog motivated and comfortable. Ending the ear cleaning session on a positive note will make future cleanings easier.
8. Regular Maintenance:
Depending on your dog’s specific needs, repeat the ear cleaning process as advised by your veterinarian. It’s important to follow a consistent schedule to maintain your dog’s ear health.
Tips for Safe Ear Cleaning
To ensure the safety and effectiveness of your dog’s ear cleaning routine, keep the following tips in mind:
1. Use Dog-Specific Products:
Always use an ear cleaning solution that is specifically made for dogs. Products designed for humans can be too harsh for canine ears and may cause irritation.
2. Avoid Moisture Buildup:
After cleaning your dog’s ears, make sure to dry them thoroughly. Moisture trapped inside the ear canal can create a breeding ground for bacteria and increase the risk of infections.
3. Don’t Overclean:
While regular cleaning is important, excessive cleaning can disrupt the natural balance of the ear and cause irritation. Follow your veterinarian’s recommendations for the frequency of cleanings.
4. Seek Veterinary Help:
If you notice any concerning symptoms or if your dog’s ears do not improve after regular cleanings, consult your veterinarian. They can identify underlying issues and provide appropriate treatment.
5. Be Gentle:
The ear canal is a sensitive area, so always handle it with care. Avoid using excessive force, sharp objects, or excessive probing, as these can damage your dog’s delicate ear structures.
Read: Trimming Dog Ear Hair: Ear Trimming FAQs
Final Thoughts
Cleaning your dog’s ears is an essential part of their hygiene routine. Regular and proper ear cleaning can help prevent infections and maintain a healthy ear environment for your furry friend. By following the steps outlined in this article and seeking guidance from your veterinarian, you can ensure a safe and effective ear cleaning experience for your dog. Remember to be patient, gentle, and positive throughout the process, as this will help make ear cleaning a stress-free experience for both you and your beloved pet.